skip to main |
skip to sidebar
I woke up this morning and spent the next 3 hours walking around like a zombie. I keep complaining to P about how "I used to be able to do this kind of stuff and not get tired" and "why am I so sore? this stuff shouldn't be making me this sore!". But tired and sore I am...so I guess there is no use complaining about it. Enough about me...more on the house!
New wood has been sistered onto each joist downstairs to create a completely level ceiling. They were able to jack up the floor when they installed the LVLs, which took the slope from around 8" to about 2-3". A great improvement. So, we were left with a choice...install the ceiling at the slight slope or level everything out. Well, our contractor seemed to be of the opinion that most people wouldn't notice the slope, but that we probably would. I can't say whether or not the slope would bother me (maybe a little), but I know that it would drive P crazy. We went with the level ceiling. I think it was a good choice. They also put the blocking in under where the upstairs wall currently exists. We might be moving this wall...I don't know, we will see. Back upstairs in the teal bathroom look what we found! Another door! Ok, so this is the third door that we have uncovered inside of the walls...well, technically second, but we know that there is another one connecting the bedrooms that hasn't been uncovered. Who wants to be there is a fourth door connecting the front bedroom and the mini room/closet? Look at the weird way they blocked this door in. I can't figure out why they did it like this. It must have been pretty entertaining to me because I took like one million pictures of it.
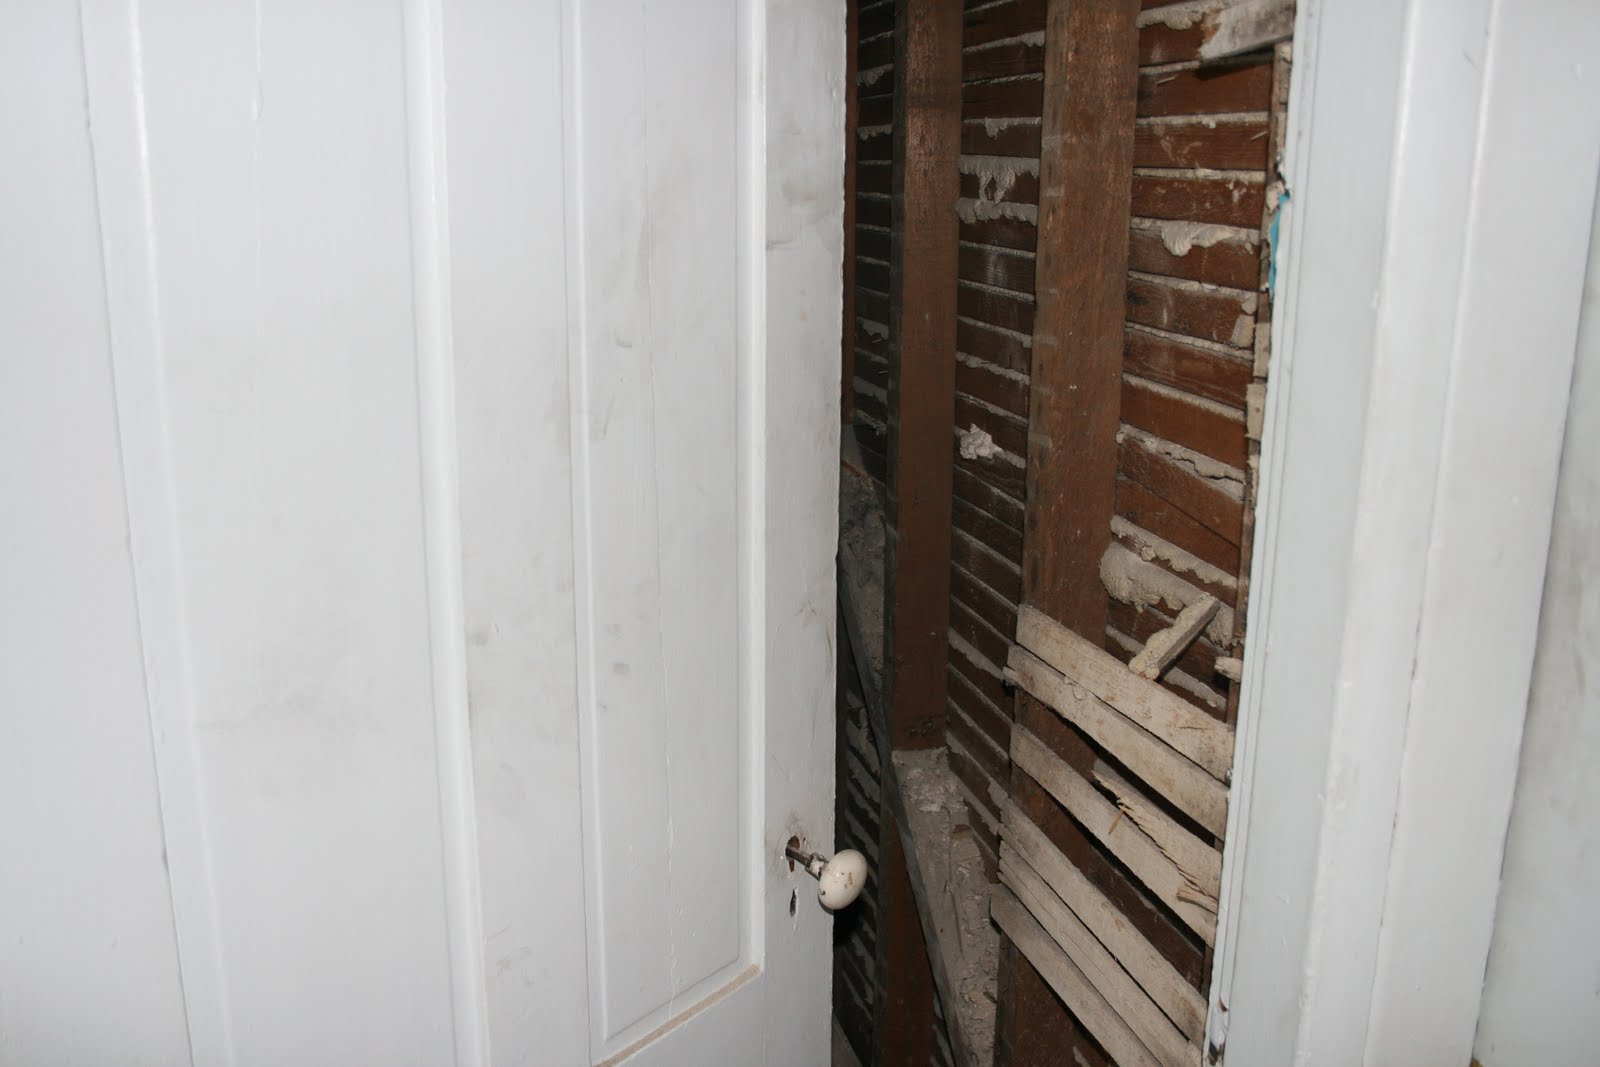
 More lath. I can not think of anything I dislike more right now than the aftermath of demoing lath and plaster.
 I also can not figure out if the walls were really painted teal on top and black on the bottom...or if maybe there was bead board over the black. Teal and black is definitely a statement.
 More of the funny blocking. Taking down walls like this always makes me wonder how long they lived with the crumbled plaster before they put drywall over it. From the looks of it they had some pretty big chunks where plaster had fallen off (see above the door).
 We closed the door and went to town and got everything in the bathroom pulled down.
 Ta da! No more plaster, no more lath. Oh wait, it's still all over the floor.
 Did I mention we actually don't have power upstairs anymore? Nope. The pictures above were all lit from my flash. This is what it actually looked like. Don't worry we had one of these for light while working. But just one. We are cheap.
 The pile. Need I say more?
 The pile after bagging for around an hour.
 A shot of my sweet roof patch skills from below. It's not leaking...yet. Remaining lead flashing to be pulled down soon.
 An old wasp nest? Maybe yellow jacket? There is also one near the chimney we took down. Imagine that...water gets in...wasps get in.
  "Mock-up" of future door location. Actually we just had the door propped there and P said "well, that's about where the door will be on the new bathroom. Take a picture". So there you have it...mock-up.
 As you can see in the picture above there is still debris all over the floor. Yeah. We didn't get it all cleaned up. We are calling in the professionals tomorrow to see how much it will cost to have them wrap this demo nonsense up. I am over it. We have way more important things to do while P's dad and bro are here next week. Like re-framing all the windows, re-framing an entire wall downstairs, removing the remainder of the chimneys, the list goes on (believe me).
Any good thoughts sent our way about very inexpensive demo quotes would be greatly greatly appreciated.
Found this article through a friend. Makes me proud of where we came from.
WDE.
Saturday wasn't the most productive day ever, but we were super excited to arrive to one exciting change! (more on that in a minute)
P was able to get a lot of the drywall down in the bathroom upstairs. And look...teal walls! Wow. That combined with the awesome brown wallpaper that we keep finding on all the other walls I am starting to think that a very talented decorator once lived here {enter sarcasm here} and I can only hope to do as good of a job. Ok, ok moving on. In case you have forgotten the only thing anyone has done to this house over the years is add layers to what was there before. So...lath, plaster, many layers of wallpaper, drywall, wood paneling. Or...wood floors, paper, glue, linoleum, glue, more linoleum. Gross. Anyway, my point is...drywall is only the first layer of stuff to remove from the bathroom. We have a long way to go. Awesome door handle on the bathroom door.
 We plugged up the skylight/former drop pipe penetration! There will be no rain (hopefully) in my yucky house. Well, at least not through that hole.
 I guess they didn't know how to properly frame in windows? Or maybe this is how framing around the windows was done in the 1800s? I don't know, but we get to redo it all now.
  Ok, so now on to the downstairs. Look! No walls! No temporary walls either! This is very exciting.
 One big open room. So much better.
  The boys had a very positive reaction to the new setup and can not wait to move back in. (Yes, they told me that)

Whew. When I look at these pictures I see so many projects that we have to accomplish! It's hard to know what to start next. Thank goodness P's dad and brother are arriving in 6 days! It is going to be so so great to have not one, but two extra sets of hands (and super experienced hands at that). We are so lucky they are coming!
Wow. It's been a long week. We've moved and simultaneously plunged into a major renovation. Surprisingly, while we are tired and stressed, we are having a great time. We are so lucky to be doing this renovation and to have the help of our wonderful families and friends. Thanks y'all! I've been trying to keep up with the process in between work, contractor meetings and late night gutting/moving stuff out of the way for the next days step. Proof that this is really all happening below:On Monday our house received a delivery of LVL's, strapping and other lumber...poor little house was stuffed to the brim. The old rotting wood column and jack column were removed from the basement, old concrete was cut out and a brand new footing was poured!
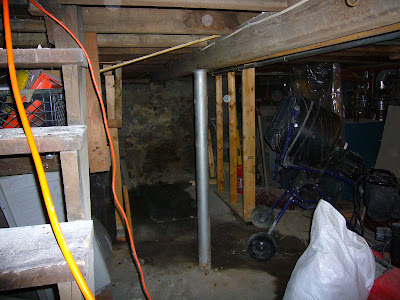 The plumbers had to come in and cut the old cast iron pipe and all other old plumbing that was in the way of the LVL installation.
 Check out those notched beams under the bathroom! Yeah, I was scared to walk on the floor above that (no worries it's fixed now!).
 We gladly came in Monday night after a long long weekend to tear out the rest of the lath, plaster and wood paneling in the entry hall so that our contractor could install beams in that area too.
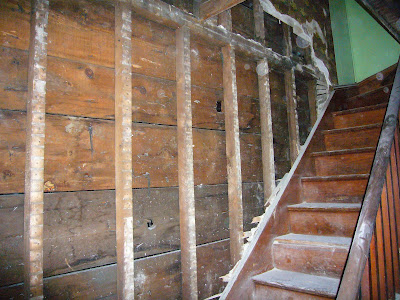 Goodbye toilet. Hello downstairs.
 Our very own accidental skylight in the bathroom. We managed to patch this one up last night about one hour before it started raining. And by we I of course mean P because I was too scared to get all the way up on the roof. I know, I know...I'm a chicken. I think I'm going to brave it this weekend in the sunshine...not as the sun is setting...and no, I don't know why that makes a difference.
 I had to throw this one in. We had to turn our clawfoot tub on it's side to get it through the bathroom door (it's a fatty). This is what we discovered on the bottom, circa November 14th 1935. Our plumber picked up one end and said "oh yeah, this is one of the light ones". Ummmm, my arms beg to differ. I guess I am just thankful we don't have one of the heavy ones. Btw, anyone want to buy a tub?
 Just look at this beam! Isn't it beautiful!?! Most of the joists under the second floor are getting one LVL sistered onto them to stiffen the whole house up (it really has worked, the upstairs used to be like a trampoline). Then two beams (made of three LVLs each) will sit on the sill and carry the load from upstairs. All of this to remove two interior walls (and stiffen up the whole house). It seems excessive, but guys, I can already tell it is so worth it! I can't wait for wall-less pictures!
 Speaking of wall-less pictures. Proof that one of the walls has already been removed! We plan on filling in where the walls once were with a contrasting hardwood and then finishing the floors all at once.
 Just two days after delivery, look how much smaller that pile of LVLs has gotten! Oh I can not wait to get over there tonight and see the progress. They are hoping to have all installed by the end of this week...which means, no walls no walls! So exciting.
  Back down in the basement the two lally columns have been installed. See them there in the back?
 Renovations make Porky tired.
 Whew. It makes me kind of tired just looking at the photos. I know some of you might be thinking, "what are K and P doing during all of this?". Well, over the next week we have to continue coordinating with the professionals while simultaneously gutting the rest of the upstairs and getting the demo debris out of the professionals way. It doesn't sound all that hard, but it really is. Plaster is heavy heavy stuff. Yuck. So, in the words of our electrician, "wow, you guys have a lot of work to do before I can start". Yes, yes we do.